DIY Tutorial: Zipper Headpiece
MAKE YOUR OWN
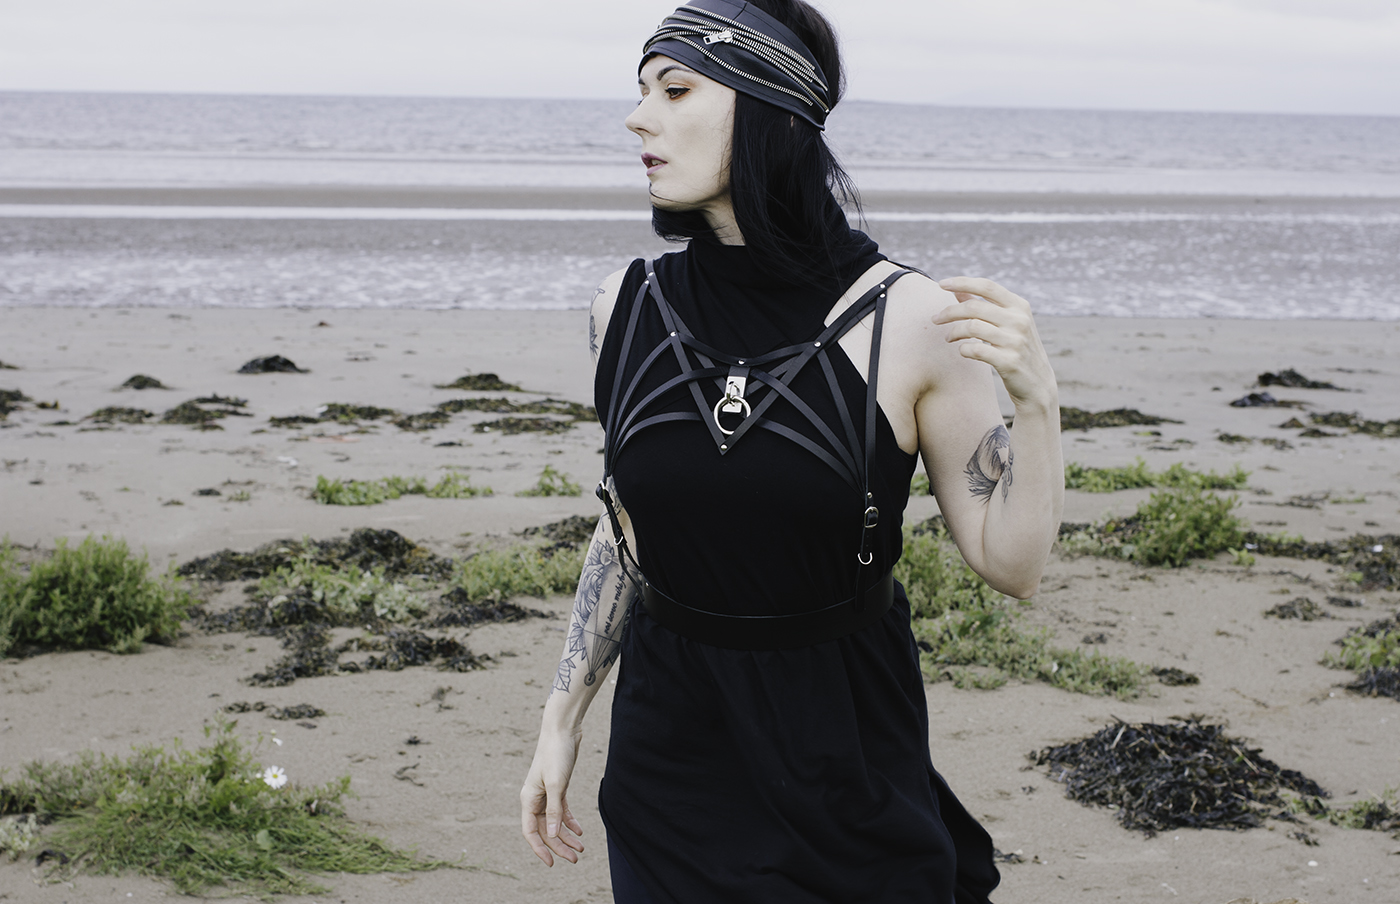
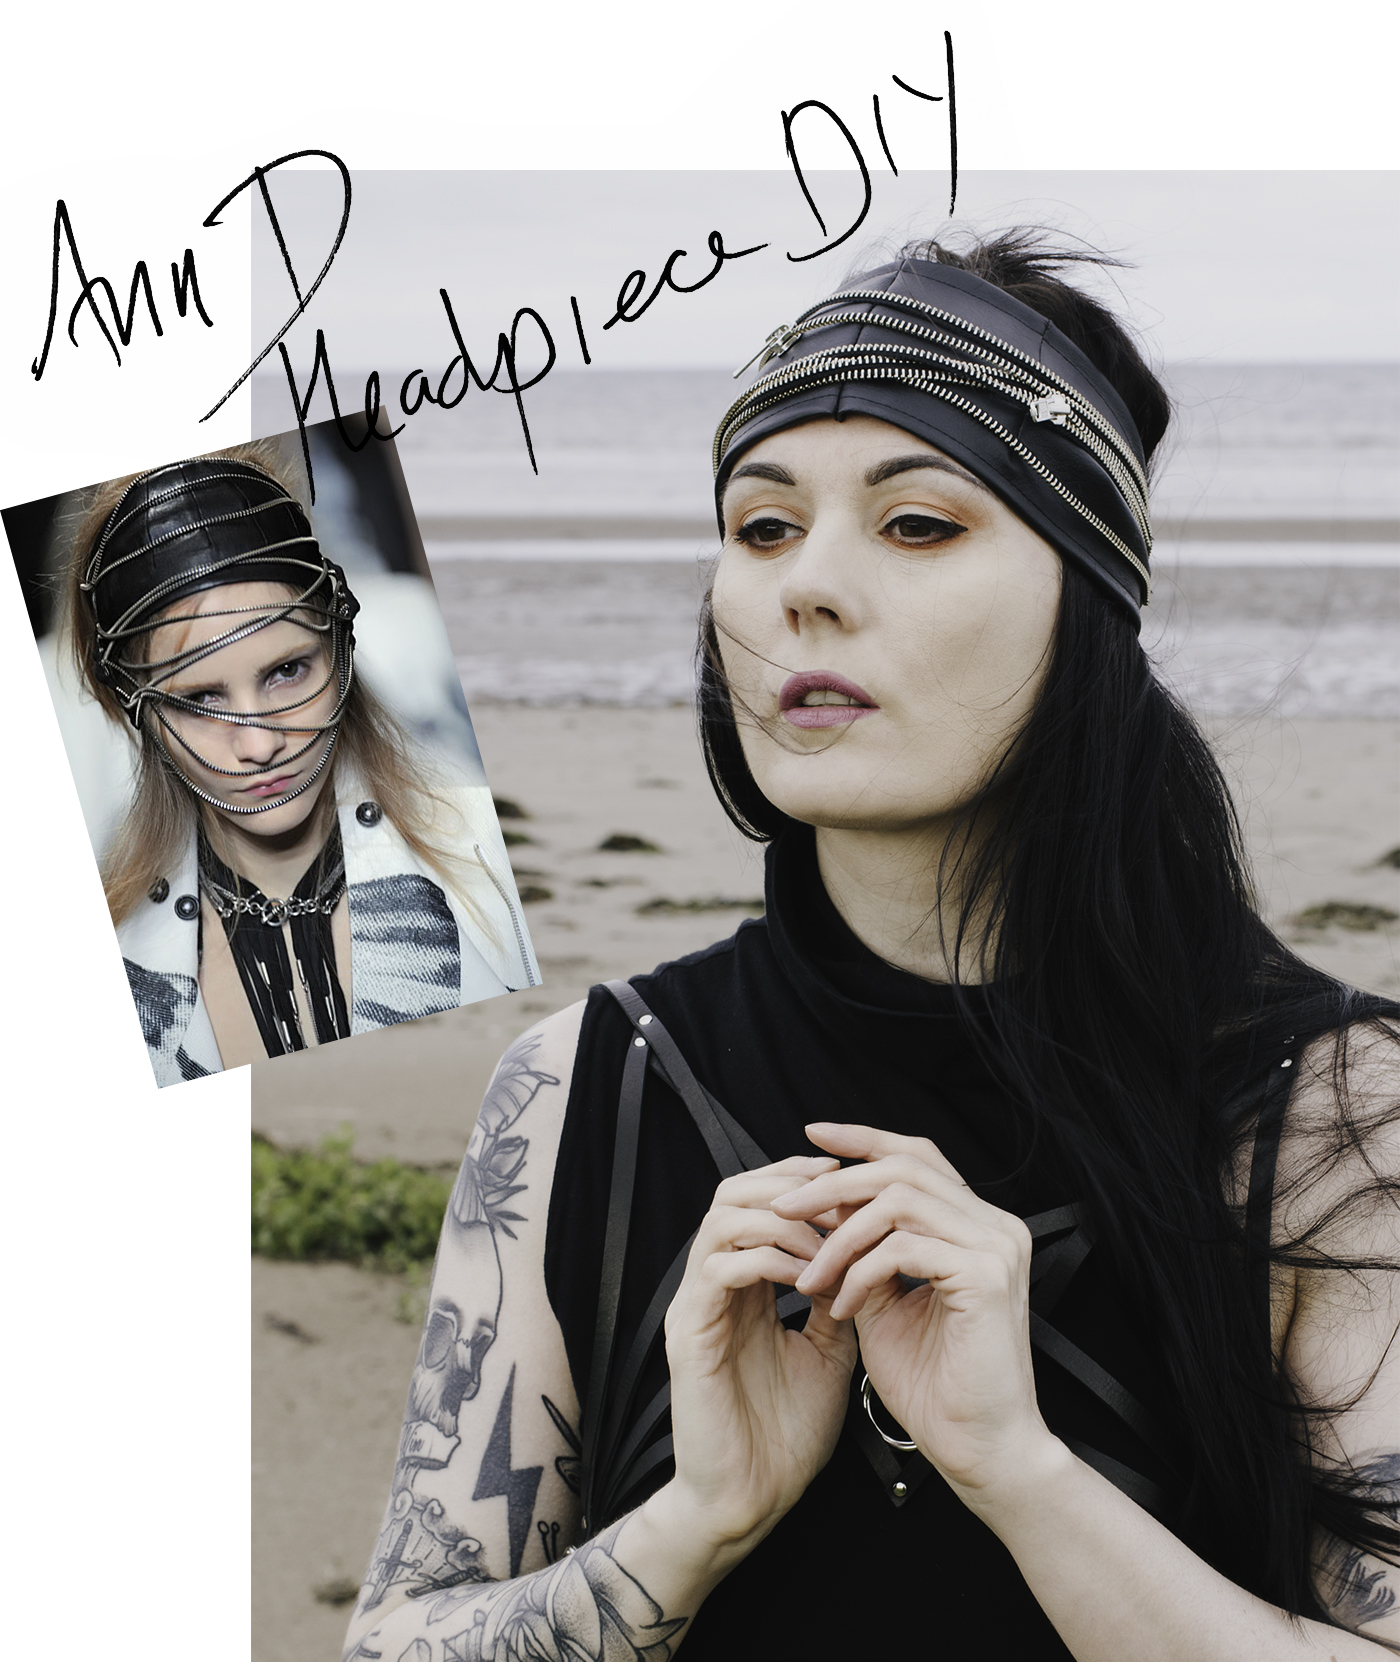
ANN D INSPIRED HEADPIECE
A few of my followers on Instagram were keen for me to share my Ann Demeulemeester SS10 inspired zipper headpiece tutorial on here, so here it is.
Like all DIYs, polish isn't really the top priority. They are by their nature quick and dirty, so don't be put off if it's not beautifully finished.
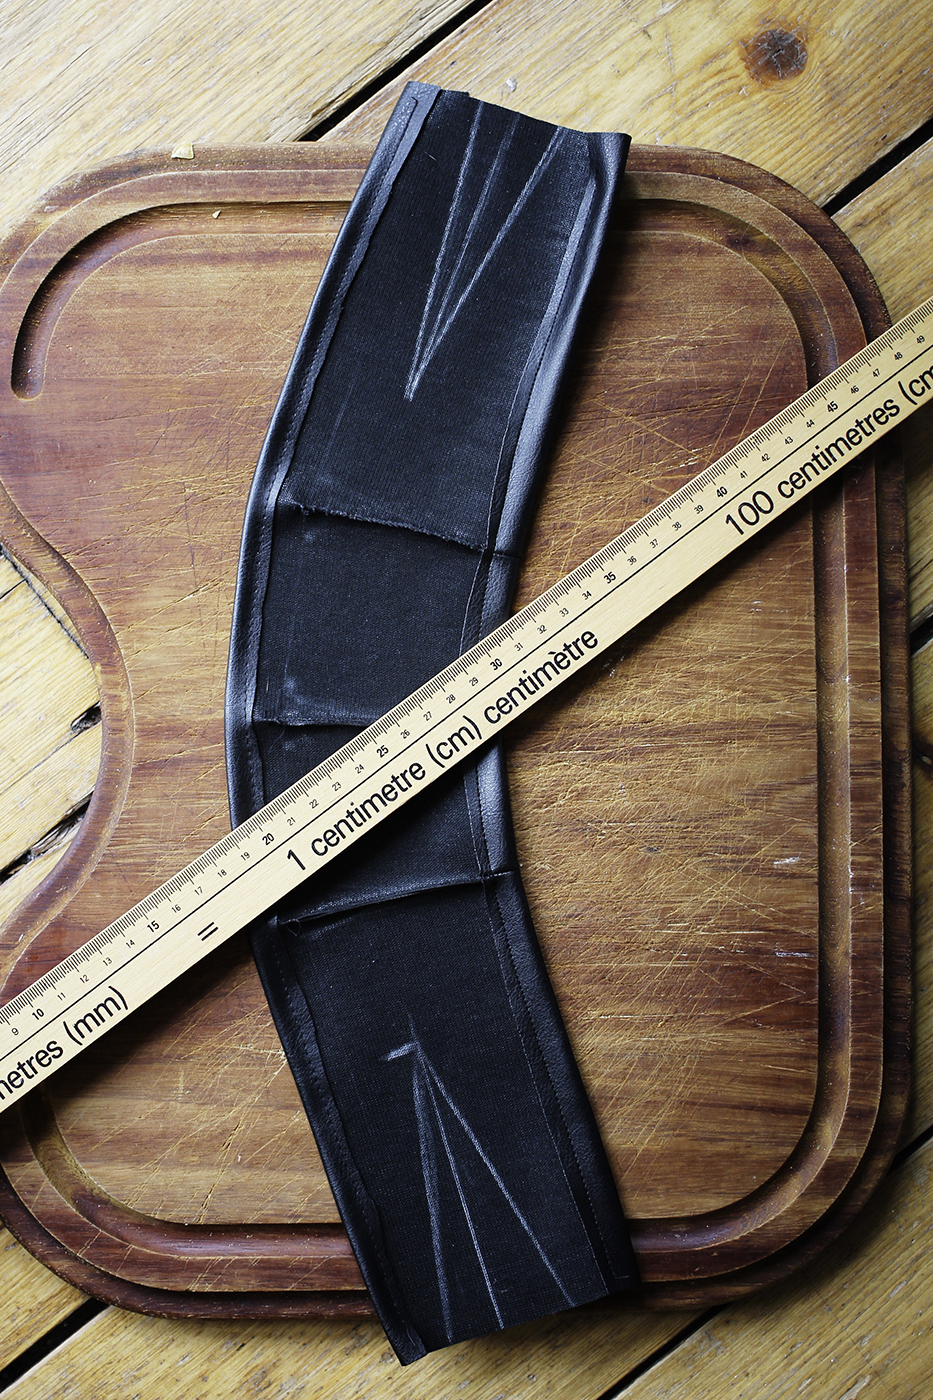
You will need some PVC (or leather if you have a sewing machine that can cope with sewing leather) and some long zippers with silver teeth. I used two but you could add more if you wanted a more dramatic effect.

STEP 01
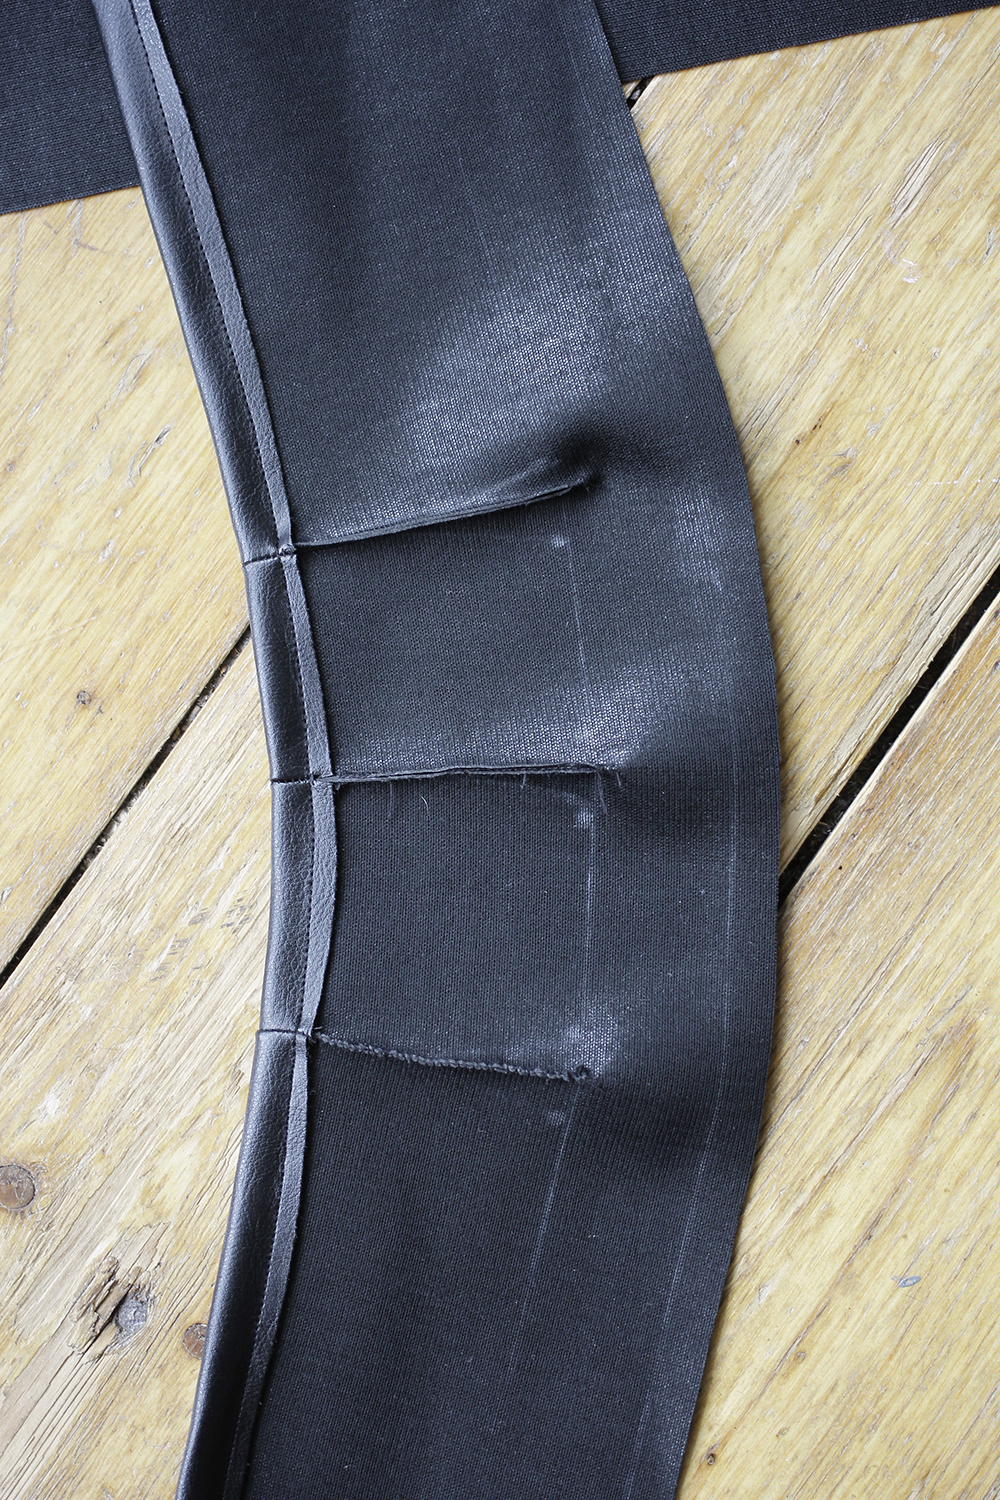
Decide how deep you want your headband to be then mark 3 triangles on the reverse of the PVC. This is to create darts to shape the headband a little. leave enough space top and bottom for hems too.
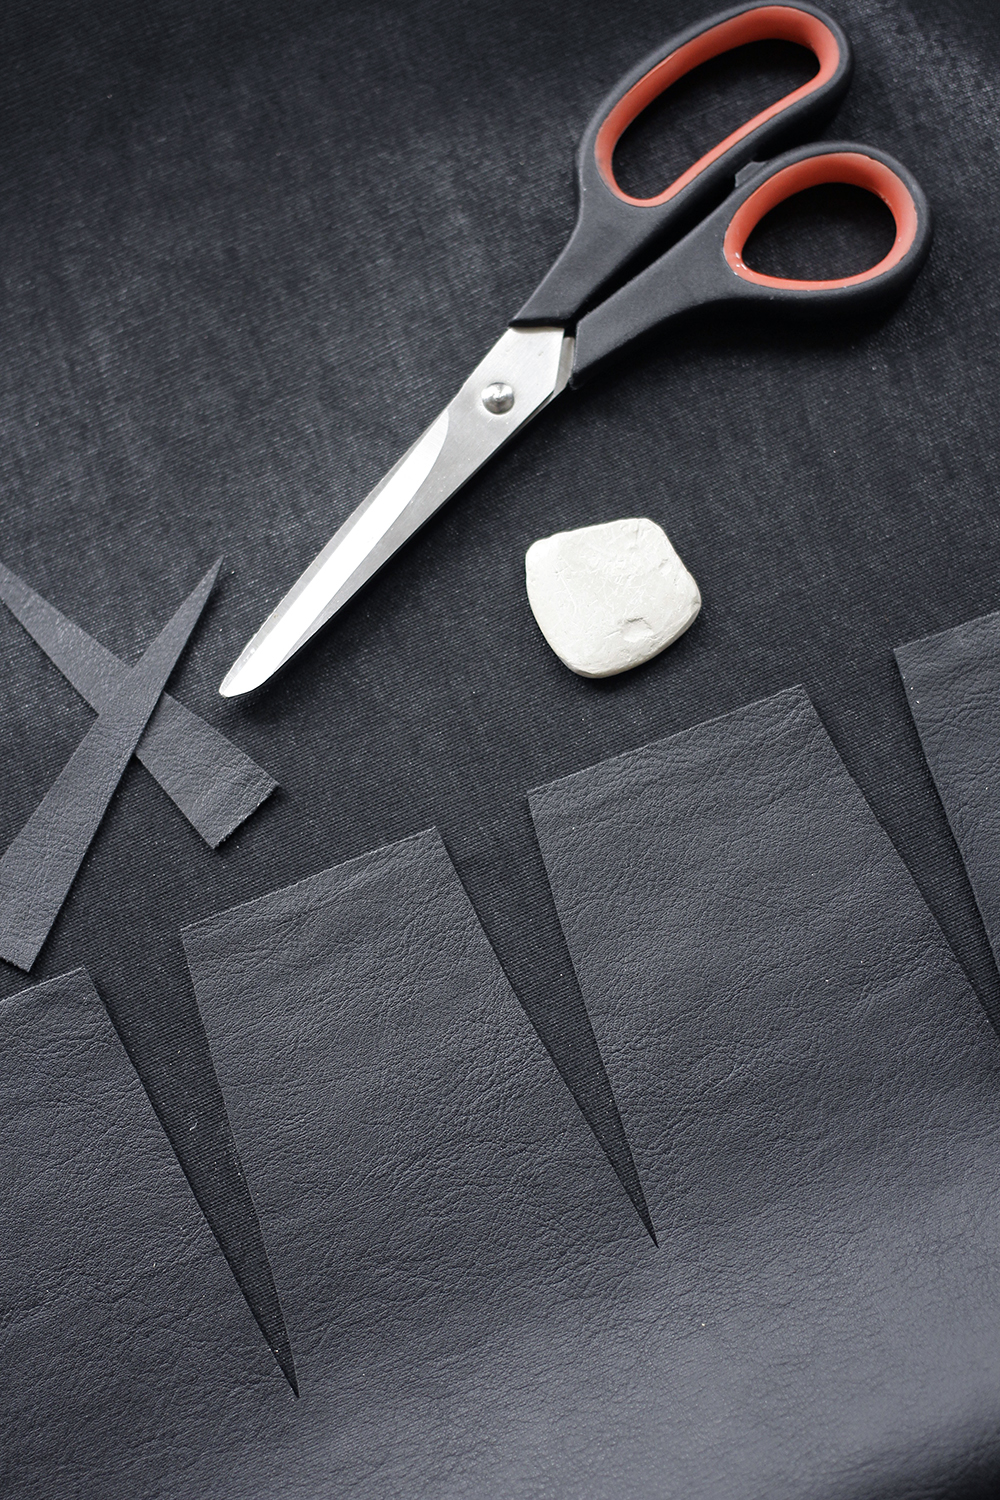
STEP 02
Cut out the triangles.
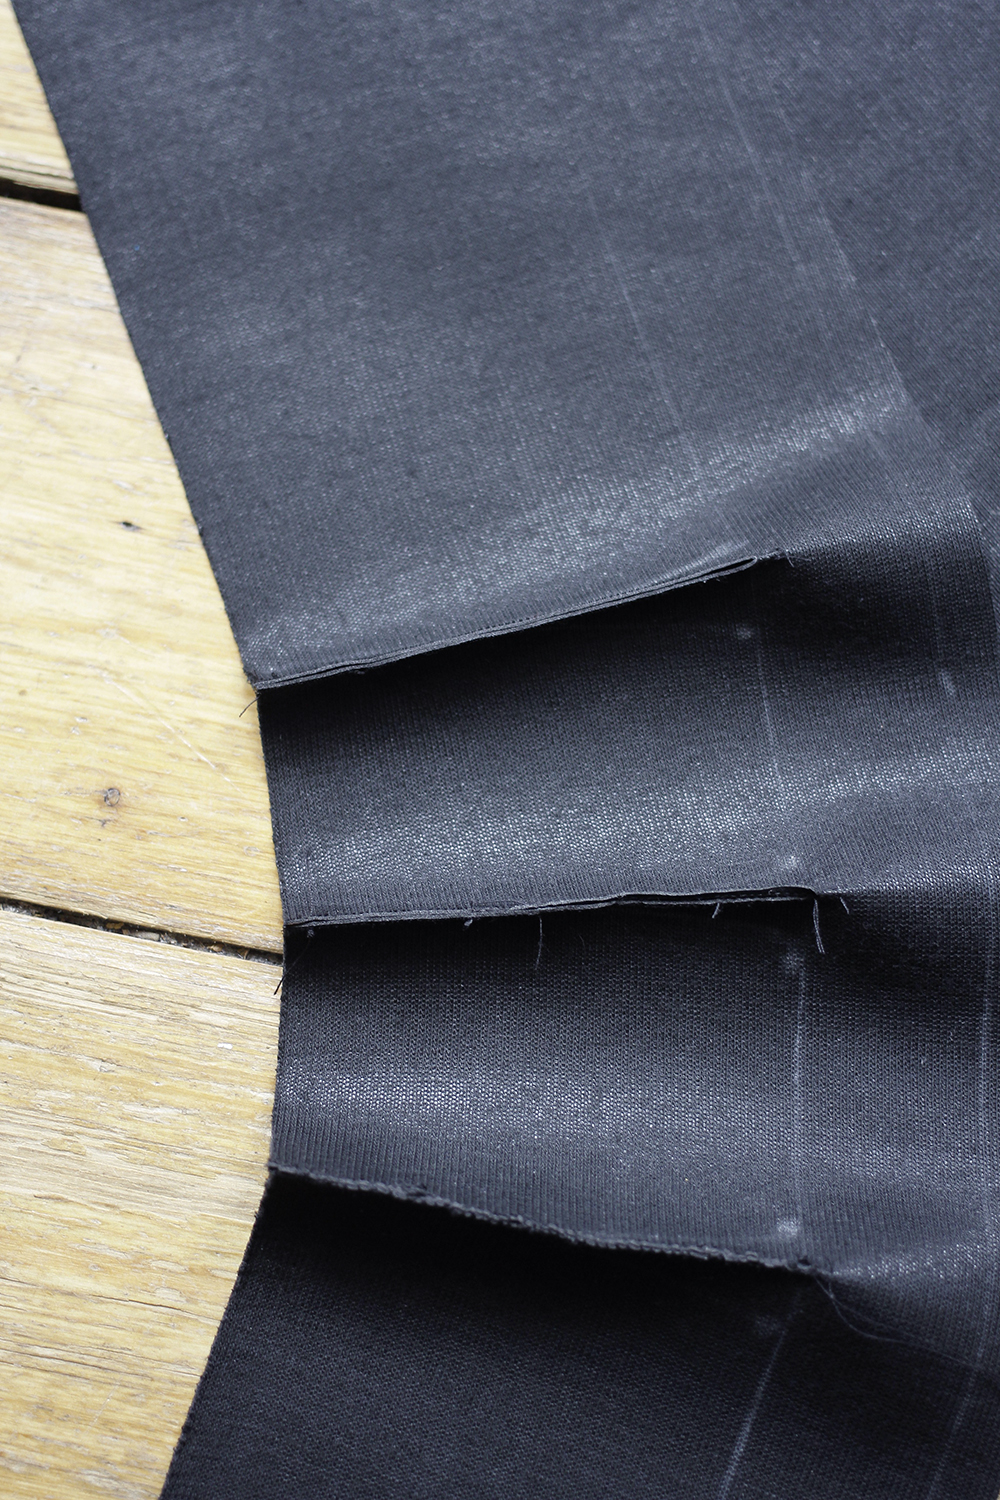
STEP 03
Stitch each side of each triangle together to create the darts.
STEP 04
Hem along the short edge.
STEP 05
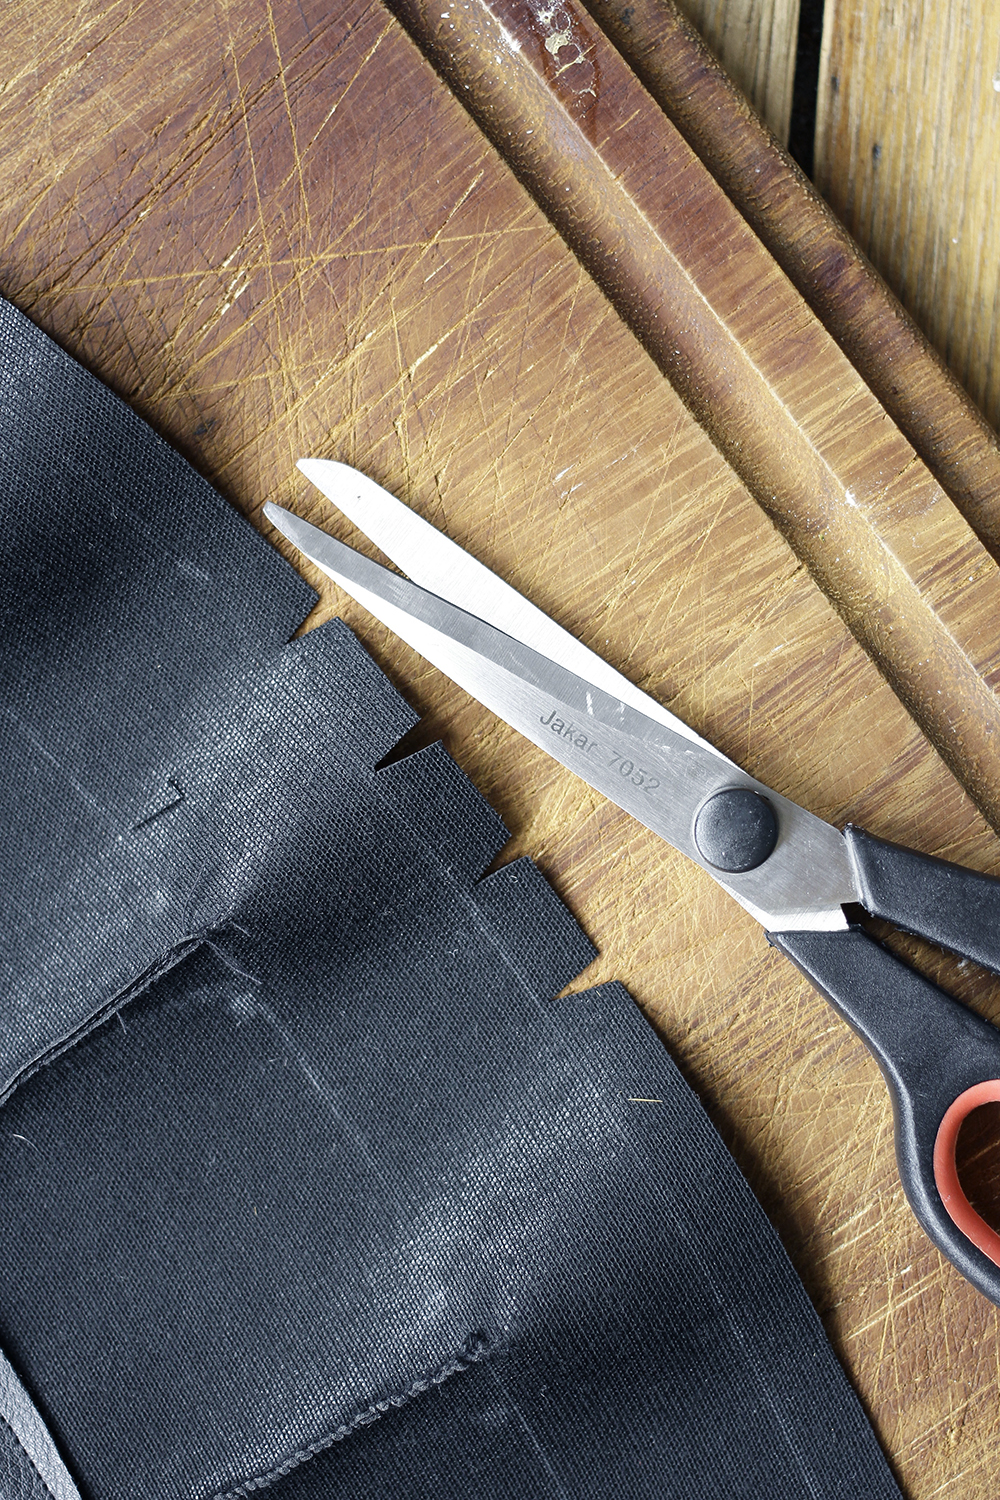
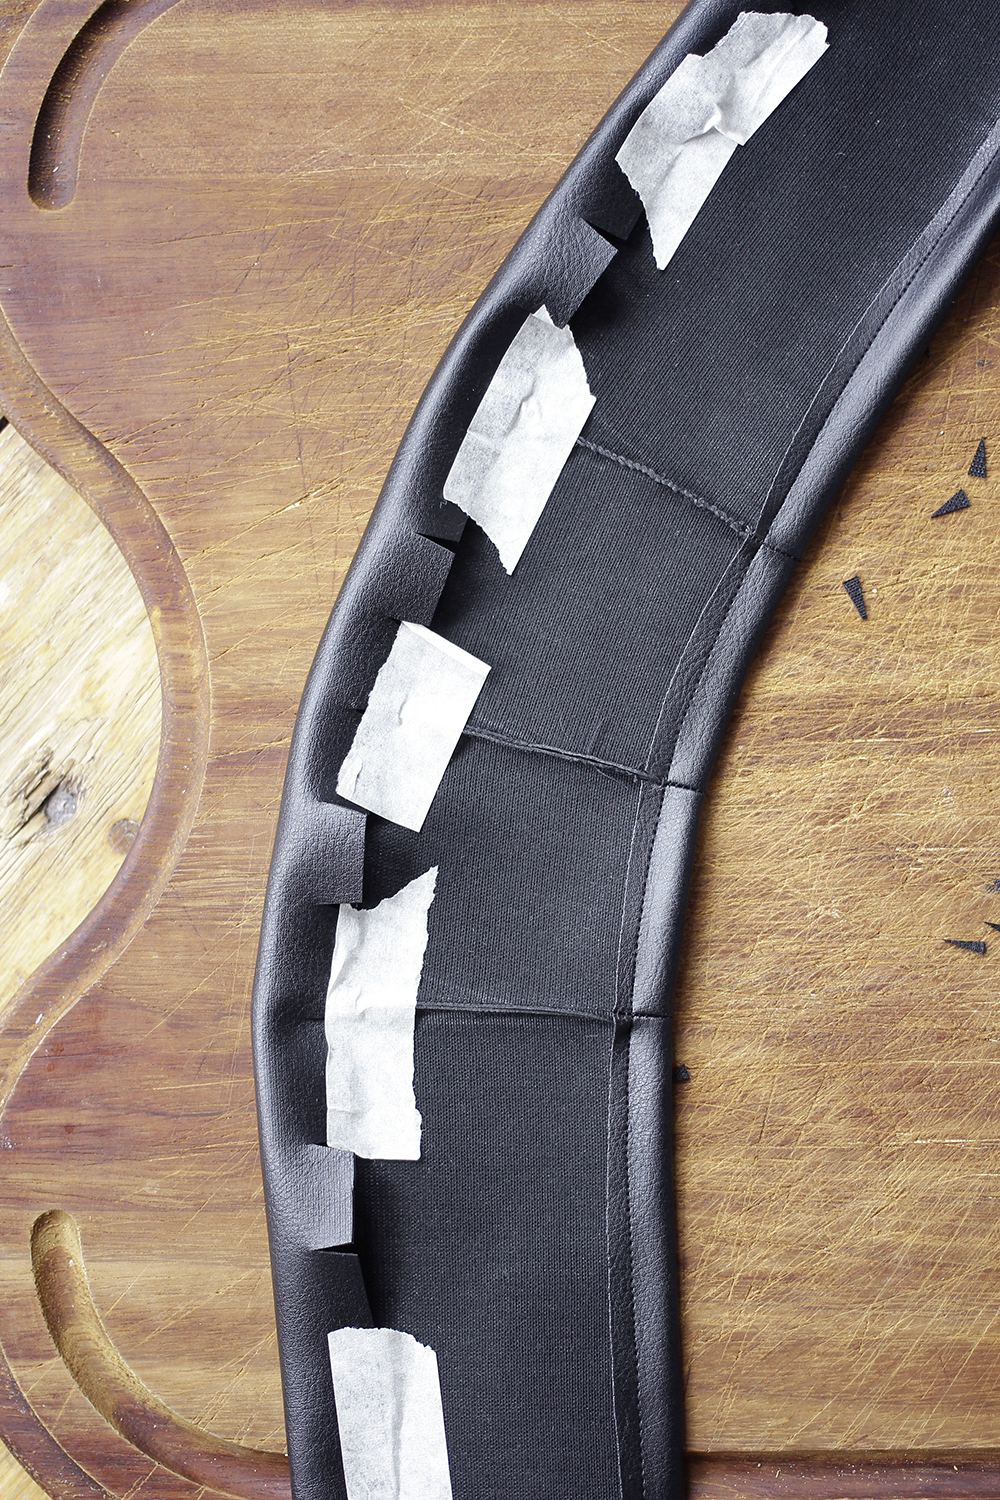
We want to also hem along the outside edge but because of the darts the headband is now curved and hemming a curve is a bitch, so cut out little rough triangles along the outside edge.
STEP 07
Tape the hem in place so it's easy to sew. Don't pin the hem as you won't want wee holes in the PVC, so taping it better.
STEP 08
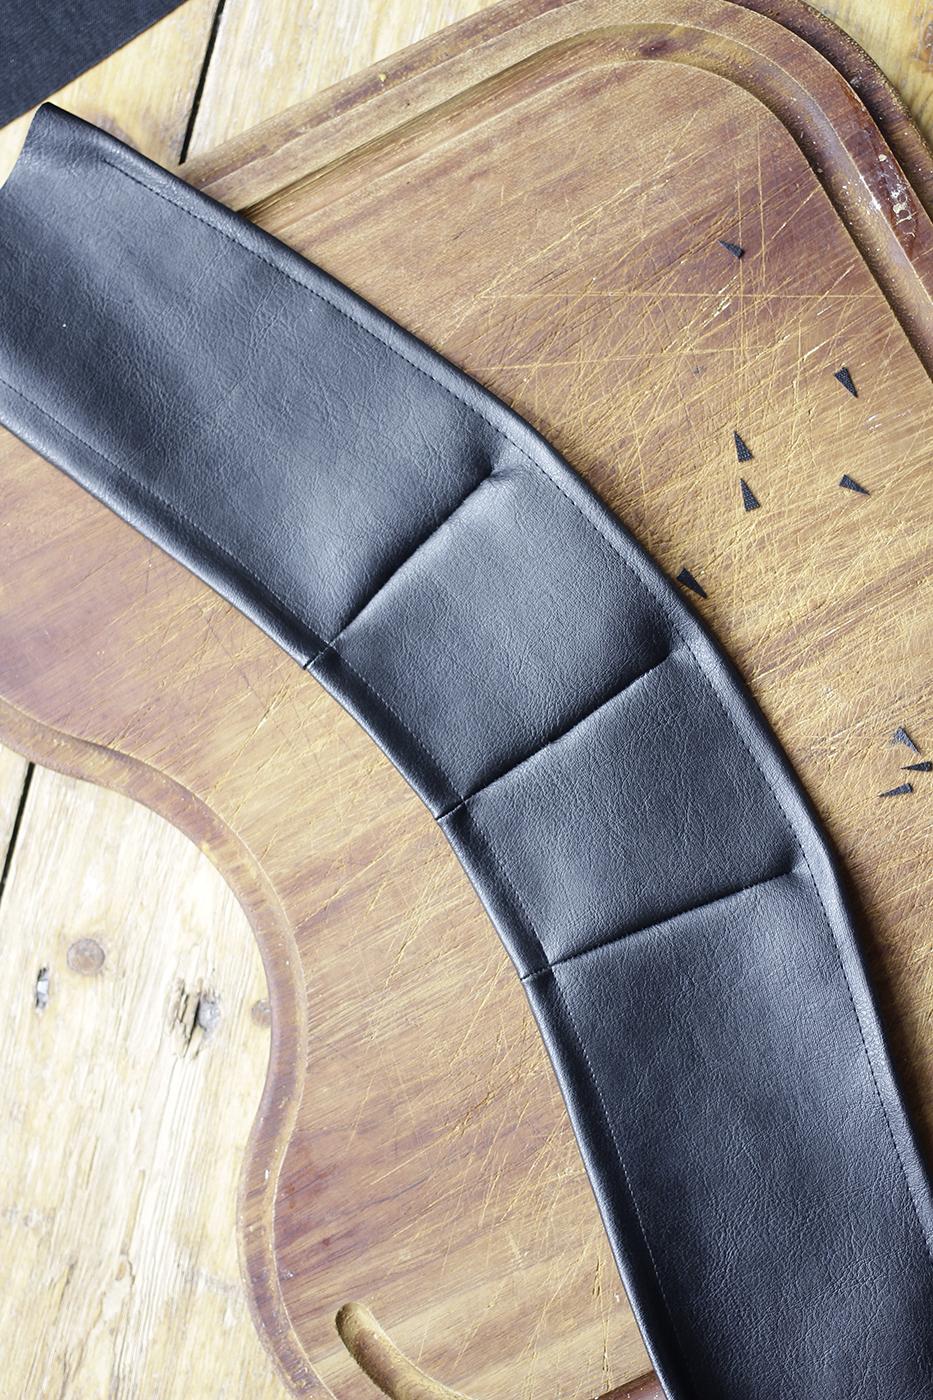
Hem that sucker.
STEP 09
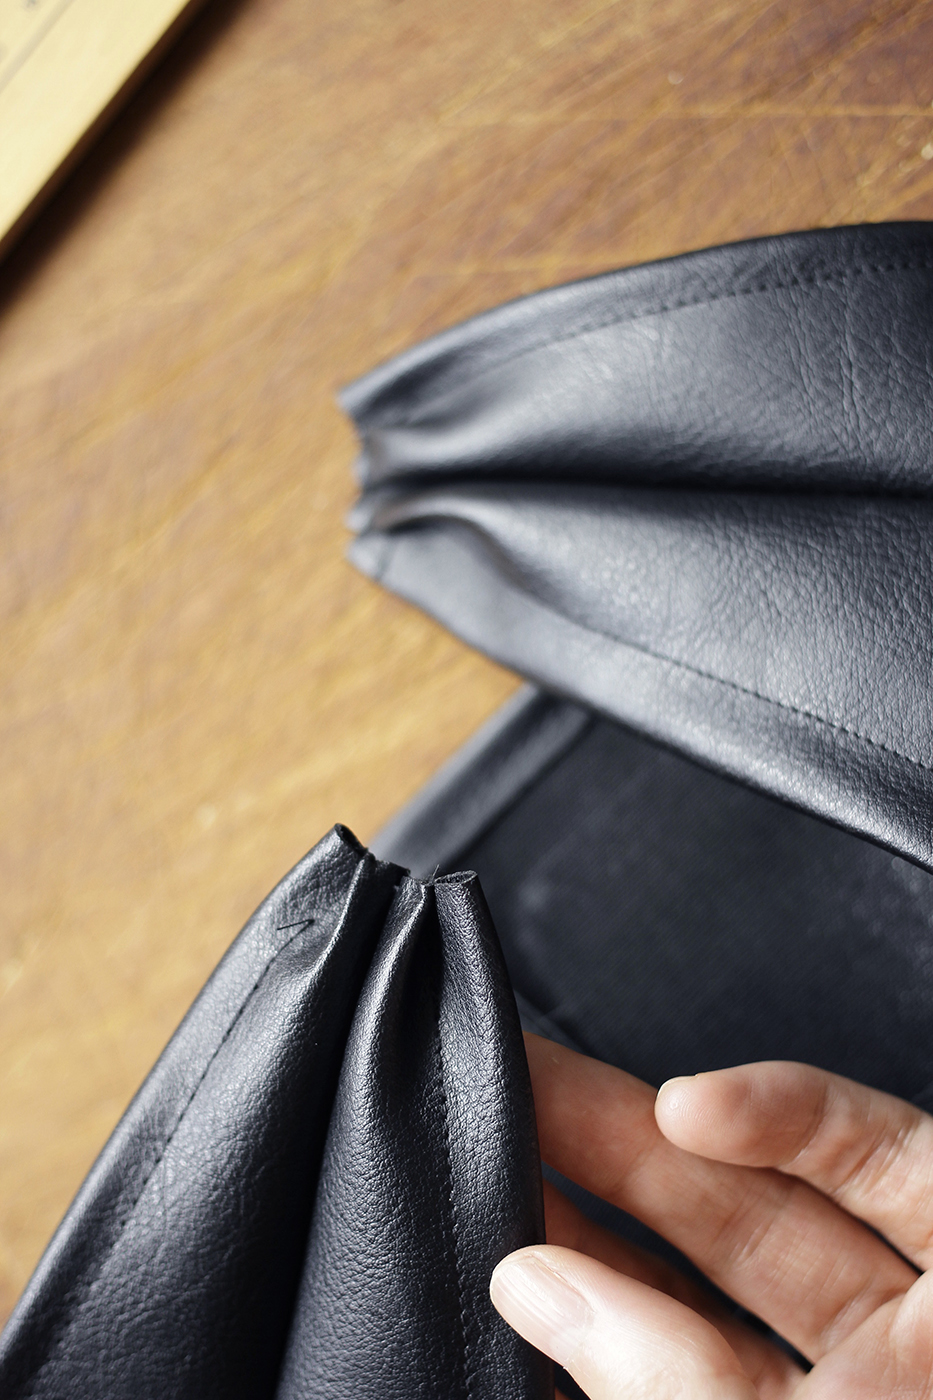
Now we want to shape it a wee bit more so make two more triangles at either side for more darts as we want it to narrow at the back.
STEP 10
Once you've sewed the darts, add a couple of little pleats too as we want this to be narrow so it fits some elastic.
STEP 11
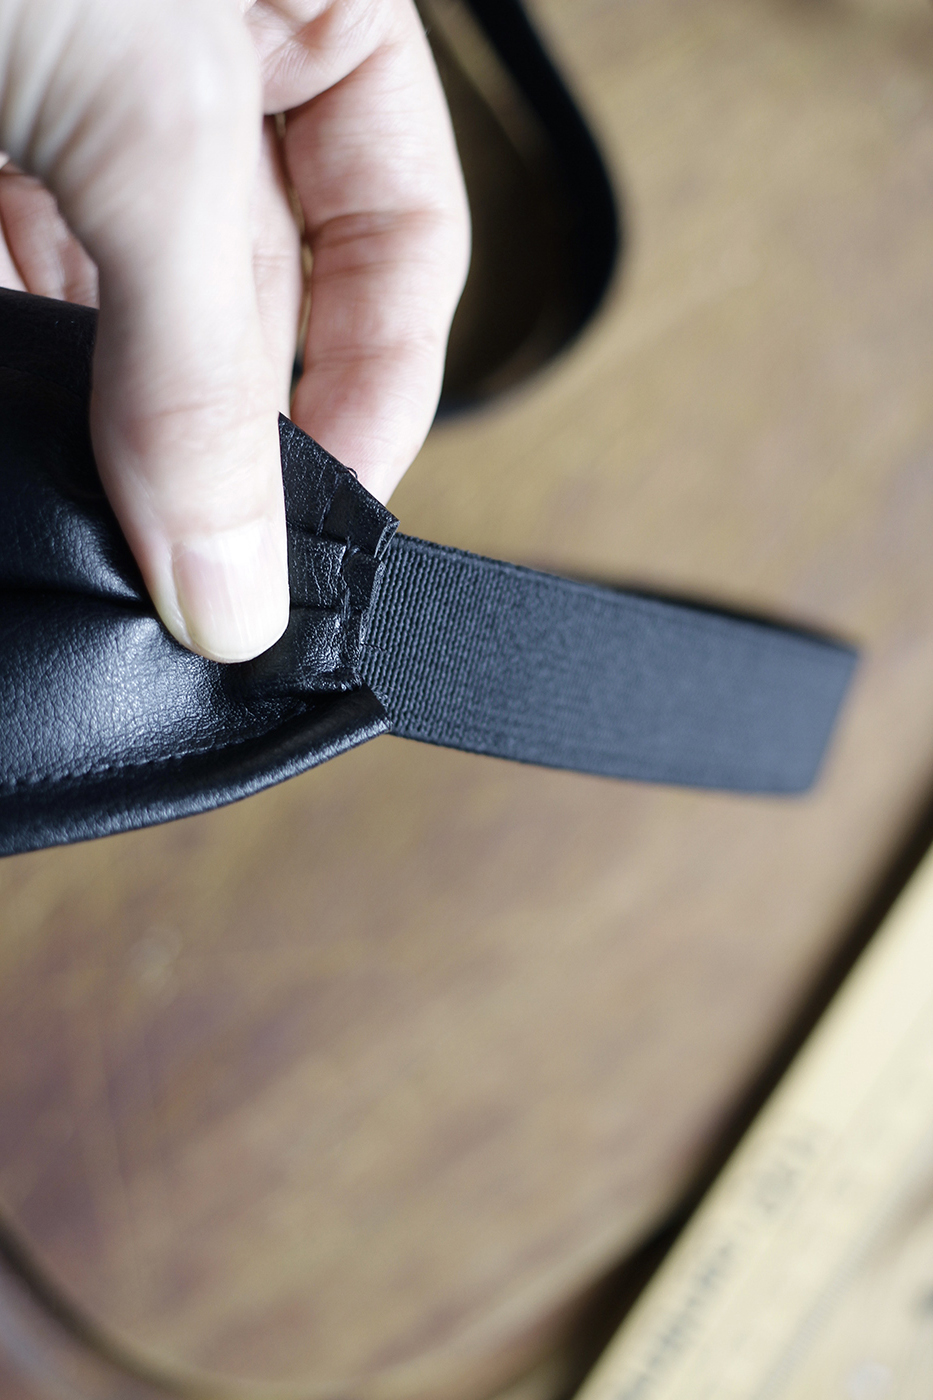
The band is held in place with some elastic. I used 1" elastic. Just attach it to each side.

STEP 12
Cut the fabric off the zip as close to the edge of the teeth as possible.
The final step is to add strips of zips wherever you want them. Cut the long zips into smaller strips and just place all over the headband. Sorry I forgot to photograph that stage. The Ann D one has zips that fall over the face too but for obvious reasons that's not entirely practical. You can also adjust the darts once the headband starts to take shape. I extended my centre dart down the edge as I wanted it more curved. Just play about with it and you'll discover the shape that suits you. Again this is just quick and hardly the correct way to create a headpiece I'm sure, but it does the job and it won't take more than an hour. Done.
One easy Ann D DIY.